Who May Create a List
Any member of the Princeton community -- whether faculty, staff, or student -- may establish an e-mail list, as long as it supports research, administration, or other recognized university activities. There is no charge for creating a list or using the OIT list server. Each list must have an owner who bears ultimate responsibility for all aspects of the operation of the list. (The primary owner may arrange to share or delegate list owner duties to additional list owners.)
To request a list for a sponsored undergraduate student organization, please see Article 3076.
Access ListServ
The LISTSERV system is accessible through the web at www.princeton.edu/lists. Access to LISTSERV requires an email address and password. For Princeton users, your login name is your netID@princeton.edu email address; use your University password to enter the site.
Click ListServ at Princeton University to access the ListServ application.
ListServ Login
If you have an active Princeton email address (netID@princeton.edu), login to LISTSERV using your Princeton University email address and password.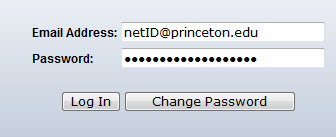
LISTSERV users with non-Princeton email addresses can access the LISTSERV web interface by registering for a LISTSERV password using their external email address. Please refer to Register for a LISTSERV Password for more information.
Request a LISTSERV list
To Request a ListServ, complete the LISTSERV Request form.
Delete a LISTSERV list
To Delete a ListServ, complete a Generic Request. You must be a list owner, and should inform your co-owners (if any) before requesting deletion.
How to complete the ListServ Request Form
List Name and Title
List name: The requested name can have a maximum of 18 characters. It should contain only letters, numbers, dashes (-), and underscores (_), with no spaces. Capitalization does not matter. Choose the name carefully because changing to a new list name is difficult and confusing for subscribers.
Type of list: Undergraduate student organization, Graduate student organization, or Department/Office
List Owners
List owners manage subscriptions. The owner or subscription manager must subscribe members manually via the web interface; any other attempt to subscribe will be rejected. Best for small, private lists, such as administrative lists for departments or organizations.
Name and e-mail address of primary list owner: The e-mail address of the list owner should be the address from which the list owner will be sending messages to the list or list administration commands to LISTSERV. The system uses this e-mail address and list password to verify that you are the list owner.
E-mail addresses of additional owners (if any): Secondary owners can share list owner responsibilities. For example, a manager may be the primary owner, but may assign an assistant as an additional owner for daily administrative tasks.
List Attributes
Who may send messages to the list.
- List Subscribers can send to the list ("Private"). The list will accept postings only from subscribers and list administrators. This option is recommended to help prevent unwanted mailings to your list.
- Only list owners can send to the list ("Announcement"). The list will accept postings only from the list owners, and no one else. Use this form, often called a "one-way" list, when the purpose of the list is to post periodic announcements rather than to serve as a vehicle for interaction.
Where replies go:
- Replies to list go to all subscribers ("List"). When a reader replies to a post, the reply will be addressed to the mailing list, not the original sender. This option is best for discussion-type mailing lists, especially small, informal lists. However, a subscriber who wants to reply to an individual sender can change the "To:" field in his or her e-mail program while composing the reply.
- Replies to list message go to sender of message ("Sender"). When a reader replies to a post, the reply will be addressed to the original sender, not the list. This option helps prevent personal responses from going to the whole list, and is recommended particularly for large lists to avoid mistakes and distribution of unwanted mail. Lists used primarily for announcements should also have this option set. However, a subscriber who wants to reply to the entire list can change the "To:" field in his or her e-mail program while composing the reply.
Who may subscribe to a listserv:
Anyone can subscribe ("Public list"). Anyone can subscribe via the LISTSERV web interface or by sending LISTSERV the appropriate command. Best for public discussion lists.
Add or Remove ListServ subscribers
Log into the LISTSERV at Princeton University. In the List Management Dashboard, select the list you want to manage from the Select List pull-down menu. Click List Management on the LISTSERV toolbar and select Subscriber Management.
- To add a new subscriber, enter the subscriber's email address in the Add New Subscriber box and click on the Add to Listname button. To enter a subscriber's name in addition to the email address – this is optional – simply add their first and last name after their email address.
- Note: If you are adding a new subscriber who is on the Princeton Exchange email service, add them as netID@princeton.edu; do not add them as netID@exchange.princeton.edu.
- If you do not want the new subscriber to receive an email notification following addition to the list, select the radio button Do Not Notify the User.
- To remove a subscriber or examine/change the subscriber's options, enter the subscriber's email address in the Examine or Delete Subscription box and click the Search in Listname button. Make the desired changes on the View or Set Subscriber Options page and select Update to save the settings or Delete to remove the subscriber from the list.
- For information on the subscriber options on this page, see LISTSERV: Answers to Frequently Asked Questions.
- If you do not want the subscriber to receive an email notification of the change/deletion, select the radio button Do Not Notify the User.
- The Delete From All Lists button on the View or Set Subscriber Options page will remove the subscriber from all lists owned by the Owner that is currently logged in.
Remove an address that causes undeliverable errors
Sometimes an address is accidentally subscribed to the Listserv list that is formatted in a way that renders it unusable. It generates undeliverable errors and the List owner is unable to unsubscribe it themselves. Here is how OIT can do it for them:
- Go to the "List Management" menu - select "Subscriber Management"
- Click on "Review List members in browser"
- Copy the entire list of subscribers to notepad (text editor) and delete the problematic address(es)
- Save in a new file on desktop as a text (.txt) file. For example, FixedList.txt.
- Select "Bulk Operations" tab
- Choose input file (FixedList.txt from desktop in this example)
- Select the "Remove all subscribers from [Listname], and add the imported addresses" radio button
- Click "Import"
- You will see result messages like:
- DELETE: 51 subscribers removed.
- ADD: no error, 50 recipients added, no entry changed, no duplicate, none forwarded.
Add listserv subscribers from a spreadsheet
- Your list of subscribers must be in the proper format. The input file must be a plain text file, *.txt, (not a Word document or a spreadsheet) and must contain one email address per line, optionally followed by a space (or Tab) and the subscriber's name. If your list of subscribers is in an Excel spreadsheet or Word document, you will need to save it to the proper format before bulk processing to the LISTSERV list. Note the text file cannot contain any extraneous data, just a column of email addresses and (optional) subscriber name.
- Log into the LISTSERV at Princeton University. From List Management on the toolbar, select Subscriber Management. If you own several lists on LISTSERV, first select the list from the drop down box and ensure that you are adding subscribers to the desired list. Click on the Bulk Operations tab for the list. In the Function area, select the appropriate radio button. In the Input File box, browse or type in the path to the text file (created from step 1) containing the desired subscribers.
- Before clicking the Import button on the Bulk Operations page, it is helpful to know how many subscribers included in your text file because once you click the Import button, LISTSERV will display a confirming message indicating how may subscribers have been successfully added/removed, and also, if there were any errors with the import. When you are ready, click the Import button to add/remove the subscribers. Verify that the proper numbers of subscribers have been added/removed.
Display To and CC to all subscribers
LISTSERV Lists remove all addresses from the TO: and CC: headers other than the list itself by default. For example, if a user sends a message such as:
TO: computing-support@princeton.edu
CC: billgates@outlook.com
When it is distributed to the subscribers of computing-support@princeton.edu , they will only see the following in the to field:
TO: computing-support@princeton.edu
This behavior can be changed to retain the contents of the TO: and CC: headers, but it is configured on a subscriber level basis, meaning that each individual subscriber may change their own personal setting. As as listowner, you may change the default setting which all subscribers receive when they are are subscribed. You must then also bulk change the setting for all existing subscribers.
The change the default setting for your list, add the following keyword to the Default-Options line: IETFHDR
To change the settings for your existing subscribers, send the following command to listserv@princeton.edu or by going to List Management - LISTSERV Command:
QUIET SET yourlistname IETFHDR FOR *@*
Note that setting IETFHDR for a list will supercede the setting of the Reply-To Keyword. When subscribers are set to IETFHDR, the Reply-To keyword will always be reset to Reply-To=Sender for those members.
Add or change a List Owner
If you already own the list, to add or change the owner, follow these steps:
- Log into LISTSERV at Princeton University.
- Select List Management from the toolbar, then select List Configuration and List Configuration Tasks.
- If you own more than one list, select the list you want to modify from the Select List drop-down.
- You may then add/change /delete list owners' email addresses by modifying the Owner= input box.
- To remove a List Owner, simply delete the owner's email address from the box. When you are finished, click the Save button.
Add a Quiet Owner
A Quiet Owner has the same list management abilities as a non-quiet list Owner, except that a Quiet Owner does not receive any error messages (e.g. bounce or non-delivery messages) or other administrative email notifications (e.g. subscribers voluntarily leaving the list) from LISTSERV.
Note: A LISTSERV list must have at least one non-quiet Owner.
To add or change a Quiet Owner for a list that you own, please follow these steps:
- Log into the LISTSERV at Princeton University.
- Select List Management from the toolbar, then select List Configuration and List Configuration Tasks.
- If you own more than one list, select the list you want to modify from the Select List drop-down. You may then add/change /delete list Quiet Owners' email addresses in the Quiet: input box.
To make an existing list Owner a Quiet Owner, simply move the email address from the Owner= input box to the Quiet: input box.
To remove a Quiet Owner, simply delete the owner's address from the Quiet: input box.
Add a Configuration Owner
- When set, the optional keyword Configuration-Owner=, restricts who is authorized to modify the list header configuration. This option is especially useful when a list has multiple Owners. If a Configuration Owner is specified for a list, the remaining list Owners will still be able to perform list management tasks with the exception of making changes to the list header configuration.
- Only OIT LISTSERV Administrators have the ability to set a Configuration Owner on a list. The Configuration-Owner option is available to List Owners when requesting a new list using the LISTSERV Request form.
- The Existing Owners may request Configuration Owner(s) added to their list(s) by sending an email request to listhelp@princeton.edu
Limit subscribers to Princeton only
Note: In order to limit your list to members of the Princeton community, you may need to change your LISTSERV preferences.
- Log into the LISTSERV at Princeton University.
- In the upper right corner of the LISTSERV toolbar, click Preferences. Under General Preferences, set the Mode to Expert Mode and click Update.
To limit your list's subscribers, please follow these steps:
- Log into the LISTSERV at Princeton University.
- Select List Management from the toolbar, then List Configuration and List Configuration Tasks.
- If you own more than one list, select the list you want to modify from the Select List: drop-down.
- Click the Security tab. Scroll down to the Confidential section and, from the drop-down, select Service.
- Scroll down further to the Service section, type princeton.edu,*.princeton.edu in the input box. This will limit subscriber requests to subscribers who have princeton.edu email addresses. This setting has no impact when a subscriber is directly added to the list by the list Owner.
Limit senders to Princeton only
Note: In order to limit your list to members of the Princeton community, you may need to change your LISTSERV preferences.
- Log into the LISTSERV at Princeton University.
- In the upper right corner of the LISTSERV toolbar, click Preferences. Under General Preferences, set the Mode to Expert Mode and click Update.
To limit your list's senders, please follow these steps:
- Log into the LISTSERV at Princeton University.
- Select List Management from the toolbar, then List Configuration and List Configuration Tasks.
- If you own more than one list, select the list you want to modify from the Select List: drop-down.
- Click the Security tab. Scroll down to to the Send section and drop the box down to set Send= to Service.
- Scroll down further to the Service section, type princeton.edu,*.princeton.edu in the input box. This will limit postings to the list to those from people who have princeton.edu email addresses.
Add senders who are not subscribers
In general, it is not good practice to allow senders to a list who are not also subscribers, except for the list owners. Assuming your list allows all subscribers to post to it, the first way to add a new sender is to make them a subscriber.
If you have an overriding need to make one or more persons a sender without being a list subscriber you have several approaches available to you:
- Add the sender's email address to the valid senders list
- Create a list (another listserv list) of non-list member senders and add the listname to the valid senders list.
When to use which approach:
Use #1 when you are processing a one off. You are certain that this address will never need to be placed as a sender on any other list and that no additional sender addresses will be added to this list.
Use #2 when you don't know if the criteria for #1 will be met. Examples of this are a group of departmental people who need to send to the department's lists. You don't want to have to update every list every time this group changes. The solution is to create a separate list (call it DepartmentSenders for this example) and to subscribe these users to the DepartmentSenders list. Then add "(departmentsenders)" to the list of allowed senders (using the instructions below). Even if you have only 1 user this can be a win because you can unsubscribe them from DepartmentSenders and that will remove all there non-standard sending privileges. You can go back and clean up the "(departmentsenders)" entries at your leisure.
To add additional senders, follow these steps:
- Log into the LISTSERV at Princeton University.
- Select List Management from the toolbar, then List Configuration and List Configuration Wizard.
- If you own more than one list, select the list you want to modify from the Select List: drop-down.
- Click the Access Control tab. Scroll down to to the Send section.
- Place your additional email address ("user@somewhere") or list reference ("(DepartmentSenders)") in the larger box. If you have any questions, examples of valid formats appear below the box).
- Click Save
Access List Archive
To access your list's archive, please follow these steps:
- Log into the LISTSERV at Princeton University
- The List Management Dashboard will display the lists you own and additional information about the current list configuration of your list(s).
- Click the list's name to access the list Home Page, which displays the latest posted messages, the list archives, and the Search box for simple and advanced searches.
- On the right side of the screen, click on Advanced Options to search for a specific message by subject, authors email, key words (String) and/or date range.
Sub-lists and super-lists
A super-list is a "container" list that includes all the subscribers in a predefined set of sub-lists. A super-list becomes a super-list with the addition of the Sub-lists= keyword. The value of the keyword is a comma separated list of all the sub-lists. For example: Sub-lists= Testlist1, Testlist2 may be added to the list header of the super-list named Test to sub-list other LISTSERV lists named Testlist1 and Testlist2. The sub-lists added to your super-list must be lists that you own.
The difference between a normal list and a super-list is what happens when you post to it. With the super-list, the membership of all the sub-lists is added (recursively) and duplicates are suppressed. Other than that, the super-list is a normal list with its own archives, access control, etc.
Only the LISTSERV administrator can add the Sub-Lists= keyword to your lists. If you wish to use sub-lists, please email your request to listhelp@princeton.edu.
Enable self-subscription
Use the url https://lists.princeton.edu/cgi-bin/wa?SUBED1=LISTNAME&A=1 Replace LISTNAME with the name (not the email address) of the List. They will then be taken to a Listserv page where they'll be prompted to add their name and email address in order to subscribe. The request will either be automatically granted, or forwarded to the List owners for their approval, depending on how the List is configured.
Setup approval for messages before they are posted
It is possible for the list owner (or configuration owner) to change settings so that messages sent to the list must be approved by an Editor or Moderator before being distributed to the listserv subscribers.
What is the difference between an Editor and a Moderator?
- An editor can change or edit a message before it is posted, but moderators can only approve or reject messages, not change them.
- There can be multiple editors who can edit or change messages, but only the primary (first listed) editor can approve and release a message. Any and all moderators can approve or reject a message.
- An editor can post their own message to the list and it won't need approval, where if a moderator posts a message, it will still need to be approved by an editor or another moderator.
How to configure a Listserv list to have an editor:
- On the top menu bar, click List Management.
- From the dropdown menu, click on List Configuration and click List Configuration Tasks.
- Under Select List, choose the list you want to manage.
- Click on the Security tab.
- Scroll down to the Send= dropdown box and change it to Editor.
- Click "Save"
- Underneath the Send= box, check the Hold box.
- Once you've set the desired send level, scroll to the bottom and click Save.
Next, define who the editor is.
- On the top bar, select the Administrators tab.
- Enter email addresses in the Editor= field. Note that these Editors can be, but do not need to be, listserv owners.
- You must have at least one Editor, even if you intend to have moderators.
- Click Save when all desired Editors have been added.
Once you have the List configured and and one or more Editors defined, you can then chose to add moderators:
- On the top bar, select the Administrators tab.
- Enter email addresses in the Moderator= field.
- Click Save when all desired Moderators have been added.
Newsletter Templates
Newsletter templates for LISTSERV lists are a new feature in LISTSERV 16.0; however, they are disabled by default. To request that newsletter templates be enabled for your list(s), email your request to listhelp@princeton.edu.
Once the newsletter template is enabled for your list, log into the LISTSERV at Princeton University. From the the List Management Dashboard, select the list name in the table to get the list Home Page. On the list Home Page, click on Newsletter Templates in the Options section on the right side of the page.